
Achieving healthy skin at home through DIY facials
Many individuals seek radiant and healthy skin through professional facials. These treatments provide a luxurious experience while effectively addressing skin concerns such as acne, eczema, and fine lines. However, the cost and time associated with frequent visits to skincare professionals can be significant. Fortunately, similar results can be achieved at home with the right techniques and products.
This guide, informed by insights from renowned aestheticians, outlines the steps for an effective DIY facial. It will detail essential components of your routine, recommend how often to treat your skin, and highlight which procedures should be left to professionals.
Frequency and best practices for at-home facials
Experts recommend indulging in a DIY facial once a week. Aesthetician Danuta Mieloch emphasizes that consistency is key to maintaining healthy skin. While at-home facials can enhance a skincare regimen, they should not completely replace professional treatments. Other skincare specialists, including Sofie Pavitt and Edyta Jarosz, suggest scheduling a professional facial every four to six weeks for optimal results.
Seasonal changes can significantly impact your skin’s needs. Pavitt advises seeking professional care as the seasons shift, stating, “During summer, focus on protection, while winter is about correction.” Therefore, the type of facial treatment you choose should align with the time of year.
Steps to a successful DIY facial
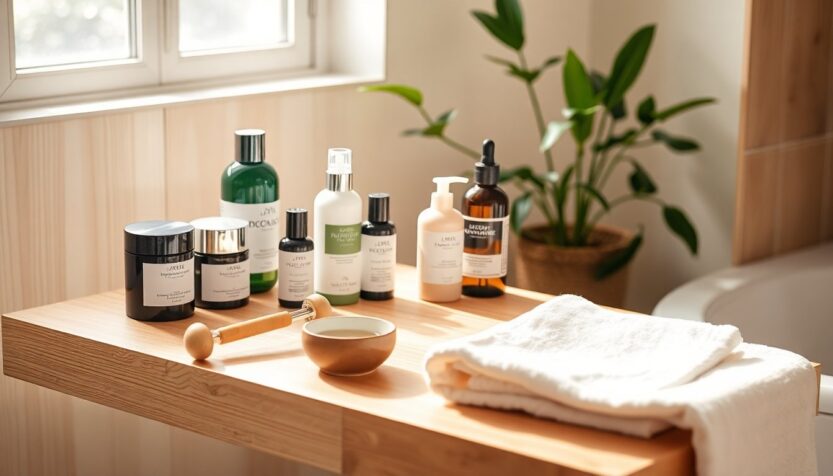
Before diving into the steps, it is essential to allocate approximately 45 minutes for your at-home facial. Many prefer to perform this treatment in the evening, allowing the skin to rejuvenate overnight. Here is a step-by-step guide to help you achieve that coveted glow:
Step 1: Cleanse thoroughly
The foundation of an effective facial begins with proper cleansing. For individuals using heavy makeup or waterproof sunscreen, a single cleanse may not be sufficient. A double cleansing technique is recommended. Start with an oil-based cleanser or micellar water to dissolve makeup and impurities. Follow this with a gentle gel or cream cleanser to deeply cleanse the pores. This two-step process ensures that the skin is free from any residue, allowing subsequent treatments to work effectively.
Step 2: Steam your face
Steaming your face is an effective method that opens up pores and softens any buildup on the skin. You can use a facial steamer or simply lean over a bowl of hot water. This practice not only prepares your skin for better absorption of subsequent products but also promotes relaxation.
Step 3: Exfoliate wisely
Exfoliation plays a vital role in achieving smooth skin. Consider using a chemical exfoliant, such as an AHA or BHA-based product, which gently removes dead skin cells and unclogs pores. If you choose physical exfoliants, ensure they are not too abrasive. Apply gentle pressure to avoid damaging your skin. Utilizing a methodical approach, like upward strokes with a cotton pad, can enhance the results.
Step 4: Apply a face mask
Select a mask that meets your skin’s specific needs. For example, a hydrating mask is effective for dry skin, while a clay mask can benefit those with oily skin. Additionally, targeted masks can address particular issues such as breakouts or dullness. It’s important to note that your skin’s needs may change, so feel free to adjust your mask selection as necessary.
Step 5: Hydrate with a serum
Following the application of the mask, apply a serum to further nourish your skin. Since your skin is prepped from the earlier steps, choose a lightweight, hydrating serum that provides moisture without being heavy. Ingredients like hyaluronic acid are particularly beneficial, as they aid in retaining skin moisture.
Step 6: Utilize skincare tools
Enhance your facial experience with innovative tools such as LED masks or microcurrent devices. These technologies can help reduce inflammation, stimulate collagen production, and provide a temporary lifting effect. User-friendly and easy to incorporate, they can seamlessly fit into your skincare routine without the risk of overuse.
Step 7: Lock in moisture
Conclude your facial by sealing in nourishment with a quality moisturizer. A well-formulated product will help retain hydration and keep your skin supple. Select one that aligns with your skin type, whether it is rich and creamy or light and airy.
Step 8: Don’t forget eye cream and lip care
The final touches involve applying a dedicated eye cream and lip balm. The delicate skin around your eyes and lips requires special attention to ensure it remains hydrated and protected.
Creating a spa experience at home
Implementing these steps allows you to cultivate a spa-like atmosphere in your own home. While at-home facials serve as an excellent complement to professional treatments, they should not be considered a complete substitute. Consistently caring for your skin enhances your complexion and instills greater confidence.